


The R8312 paint pot is a high performance tool designed for wall paints, high viscosity coatings, industrial paints and other paint applications.
It has a 5mm thickness, a one-piece molded steel body that ensures it won't burst under high pressure, and an automatic 3.8 bar pressure relief alarm. It also comes with a 3m long high-strength polyurethane air and paint hose, and a kit for φ2.0 mm PQ2U spray gun, a one-stop accessory.
Below is an example of the R8312 paint tank can from assembly to cleaning.
SSEMBLY
Connect the regulator: Locate the swivel adapter on the tank cover and connect the regulator to it. Check the regulator to find the correct position for connection to the tank.
Install the lift handle: Insert the lift handle into the threaded hole in the center of the tank cover. Tighten the hexagonal nut to secure it.
Connect the air supply hose: Connect the air supply hose to the air inlet fitting of the regulator. You can choose to connect on the right or left side.
Connecting the Atomizing Air Hose: Connect the atomizing air hose to the outlet fitting directly across from the inlet fitting.
Connect the material hose: Locate the fluid outlet on the drum lid and connect the material hose to it.
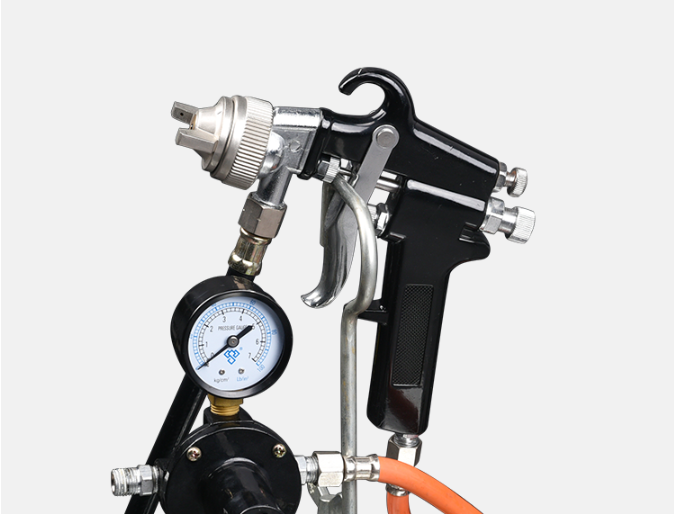
Pressure Regulator on a Paint Tank
The regulator gauge plays an important role in the paint pressure of the spray gun. For internal mixing guns, a higher tank pressure can be used. For external mixing guns, a lower pressure is recommended. Always start with zero pressure in the tank and gradually increase until the proper spray pattern is achieved. Before turning on the air pressure, make sure the regulator t-handle adjustment screw is fully loosened to shut off the air pressure. Then turn on the air and adjust the regulator gauge to the desired pressure (approximately 0.83 bar for external mixing guns). Note that the pressure in the R8312 paint can should not exceed 3.4 bar. Some of the air from the compressor or air line will bypass the regulator through the T-fitting and be delivered to the gun. Therefore, an additional pressure regulator is required between the T-fitting and the gun.
Operation
PREPARE COATING: Thoroughly mix and strain coating before filling.
SECURE CAN LID: Place the lid assembly on the can and hand tighten the lid clamping screws.
ADJUST COMPRESSOR REGULATOR: Close the paint can regulator by turning the T-handle counterclockwise. Then adjust the compressor regulator to obtain the desired air pressure to the gun.

Adjust Paint Can Regulator: Adjust the regulator on the paint can to obtain the desired air pressure for the paint. The higher the spray position, the more pressure is required for the paint. The normal operating pressure of the paint can is 1.7 to 2.0 bar. If you wish to reduce the pressure, adjust by turning the T-handle adjusting screw counterclockwise until the desired pressure is reached. There is no need to trigger the gun to relieve excess paint pressure.
Cleaning
Shut Off Air Pressure: Before opening the paint tank, always shut off air pressure at the air source and bleed all pressure from the paint tank by gently pulling on the safety valve ring.

Emptying and cleaning the tank: The tank, paint hose and gun must be cleaned immediately after spraying. After turning off air pressure and pulling on safety valve ring to relieve pressure, turn T-handle adjustment screw counterclockwise until no spring tension is felt. Loosen screw, push clamp back and push tank cap down to side. Loosen the gun air cap retaining ring about three turns, then turn on the air supply. Cover the gun's air cap with a cloth and pull the trigger. This will force the paint back into the can through the hose. Empty and clean the can and parts that come in contact with the paint using a suitable solvent.
Rinsing with Solvent : Pour solvent into the tank, replace the lid, tighten the thumb screws and clamps, and spray until clean solvent appears.
These are all the steps, R8312 will be a good partner for your work!
 video
video https://rongpeng.store